

How To Install Aluminum Flashing
Need to know how to install flashing on existing roof? We've got the data y'all need to learn almost flashing, its functionality, and how to install flashing on existing roof applications.
Flashing itself is quite elementary – flashing can refer to whatever impermeable metal barrier used to prevent the ingress of water into roof systems, or to channel water and rain away from your home.
This makes loftier-quality flashing crucial to the overall health and well-beingness of your roof. Then if your roof flashing is in poor status, your roof could exist at run a risk of water buildup, rot, and other expensive conditions that could require a roofing contractor to repair them.
To help you avoid costly roof replacements, we'll get over the basics about metal flashing installation now, and help y'all supplant roof flashing that's gone bad with high-quality, durable metal flashing.
Agreement The Deviation Betwixt L-Shaped And T-Shaped Drip Flashing – What'due south Best For Yous?
Substantially, both of these types of flashing do the same thing – they help guide water away from seams and joints in your roof, preventing water from soaking through your shingles, or in-between vulnerable joints.
50-shaped flashing is, equally the name may suggest, shaped like an "50", congenital with a elementary ninety-degree joint that flares out at the bottom. The L shape hugs the side of your roof tightly, while the flared base pushes h2o away from your siding, keeping your habitation more dry.
T-shaped flashing is slightly different. Shaped similar an elongated "T", this flashing attaches to the roof and projects outward, with a downward projection that sits an inch or two outside away for the side of your home.
The increased distance between your home and the flashing itself makes T-shaped flashing, a amend overall choice when y'all're going to install flashing on an existing roof. H2o will run more smoothly across the flashing, and exist pushed farther away from your habitation, helping you lot avoid excess wet that tin can harm your siding.
Where Should I Install New Flashing?
Flashing is generally installed at any joints or edges in the roof where water could otherwise work its way in.
In gild to properly install new flashing, you'll take to remove the shingles surrounding your erstwhile flashing, and then re-lay them after installation. Typically, flashing is installed using covering nails and roofing cement. After installation, you'll then re-lay the shingles you removed, to provide a comprehensive, water-tight solution.
Flashing tin be purchased in pre-formed styles to help y'all install it more easily, and these include:
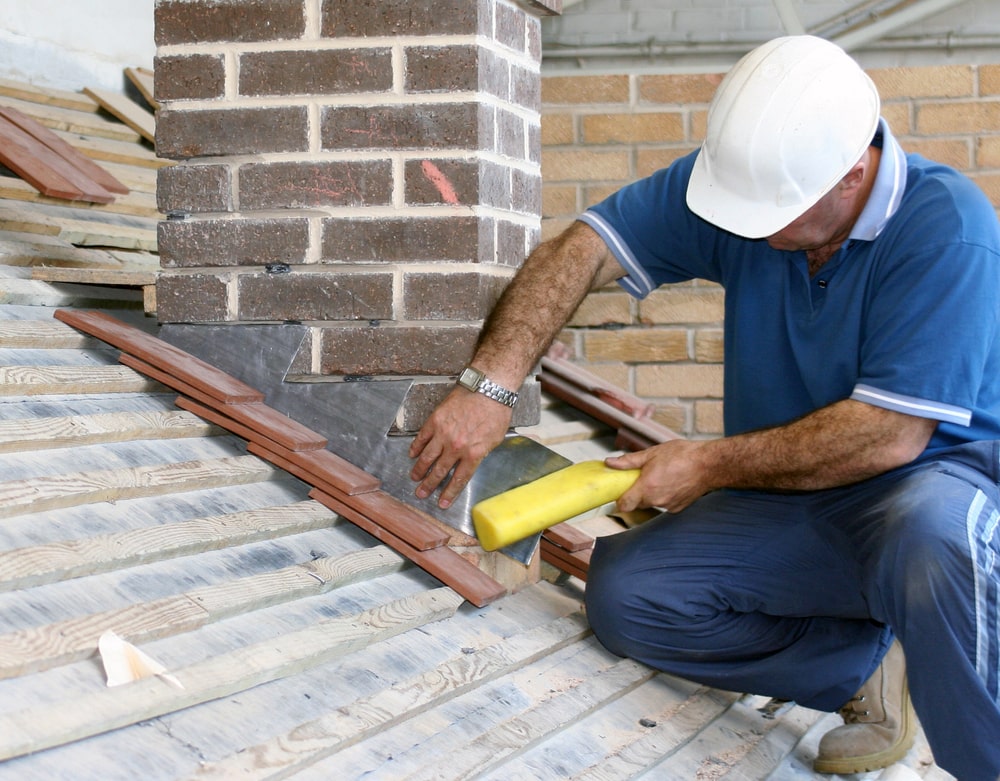
- Pace Flashing – built to protect joints betwixt roofs, chimneys, and other objects like skylights, this flashing "steps" upwards above the shingles and attaches to the object, providing comprehensive water protection.
- Vent Pipage Flashing – as the name implies, this flashing is unremarkably cylindrical, with a large, flanged based that allows you to lap it into your shingles during a roofing project.
- Valley Flashing – This flashing is commonly formed in a "Five" or "W" shape, and is used where ii different roof planes come across, forming a valley.
- Drip Flashing – As well called drip border, this blazon of flashing is installed on the edge of roofs, and helps guide water abroad from your roof and into your gutters.
Let'south take a deeper look at drip flashing now.
T-Shaped Drip Flashing – Overlap Edges To Let Water Drip
It'southward best to overlap your T-shaped drip flashing shingle-fashion when you're going to install flashing on an existing roof. Doing so will create a slightly declined outcome that helps guide water away from your roof – if yous install each slice of flashing "affluent" to the next piece, you risk water pooling and getting into seams and cracks betwixt the flashing.
It'south also best to overlap the eave metal in the management of the prevailing view. For example, if the typical view is from left to right, reverse the order – identify the right piece of eave metal under the correct piece.
50-Shaped Flashing – Utilize Where The Wall And Roof Come across
Areas where the wall and roof meet can likewise use 50-shaped flashing when y'all're in the process of start to install flashing on an existing roof – installed correctly, L-shaped baste flashing is essential to a healthy roof.
Begin by removing the shingles at the affected area, and removing old flashing, if present. Then, nail the new L-shaped flashing under the builder'southward felt, but above the fascia board.
Utilise roofing nails to install the 50-shaped flashing flush with the roof and wall, then cover it with roofing cement, and reattach the roofer'due south felt. Finally, reattach all shingles removed in the process.
Install Flashing On Existing Roof To Extend The Lifespan Of Your Roof
Whether your drip flashing has been failing and allowing backlog water into your home, or your step or vent pipe flashing is corroding, learning to install roof flashing on an existing roof is a neat way to maintain the health of your current roof. Checking your flashing is just one step in performing a roof inspection, and so exist sure to proceed up to date on the rest of your roof besides.
If you demand to install flashing on existing roof installations, simply are unsure how, don't worry – contact David Barbale abode comeback services. David is a seasoned skillful in the field of home improvement, including roofing, siding, flooring, and carpentry, and he can walk you through the unabridged procedure of how to install flashing on existing roof installations.
And so don't let your home autumn victim to rain or moisture. Contact David Barbale today, and continue your roof salubrious and happy, for a long service life.

Source: https://davidbarbale.com/install-flashing-on-existing-roof/
Posted by: grofffeeinesell.blogspot.com
0 Response to "How To Install Aluminum Flashing"
Post a Comment